QuickBooks users may face Error code 324 while logging in to their bank website through QuickBooks. This error can be a result of multiple technical issues or it might also occur due to some routine maintenance of the bank website. To know more about the error and the various methods to oustQuickBooks banking Error 324, follow the blog till the very end.
Provocative Causes Behind QuickBooks Error 324
Error 324 can appear if the last QuickBooks installation was incorrect.
Changes made to the account name can also incite this error.
Essential QuickBooks files got deleted by the user.
QuickBooks keys in the Windows registry may be damaged or missing.
A virus attack might also contribute to QuickBooks error 324.
Methods For Rooting Out QuickBooks Error 324
Method 1: Use the System File Checker
Click on the Win and R keys. This action will open the Run window.
Type cmd into the Run window to open the command prompt.
In the command prompt, type SFC and press the Enter key.
When the scan is complete, attempt to navigate to the bank website again through QuickBooks to check if the solution helped in fixing Error 324.
Method 2: Choose a Secure Connection
Open QuickBooks Online and enter your correct credentials to log in.
After that, click on the Transactions tab.
Subsequently, click on the Update option.
Once the update is finished, verify that the QuickBooks error 324 got resolved.
If the error is still persisting, navigate to the Transaction or Banking tab.
Then, select the Check connections option.
Check if the connection is seamless.
Checking for Connection in QuickBooks Self Employed
Launch QuickBooks Self-Employed and log in to the account.
Head to the Bank accounts option.
Click on the option to Refresh all.
Subsequently, click on the Transactions tab.
Now, hit the Check connections option.
Method 3: Get Rid of Junk Files
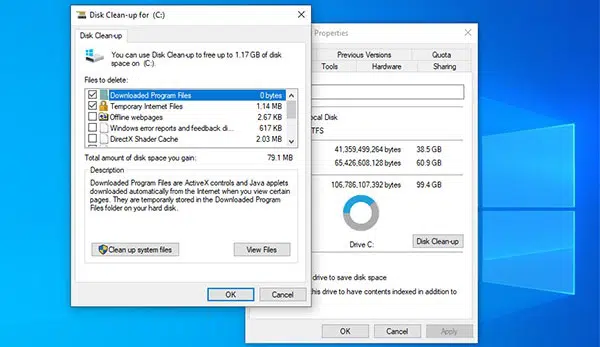
Hit the Win and R keys simultaneously.
The Run Window will appear on the screen shortly after.
In the Run box, enter cleanmgr and then press the Enter key.
Now, in the disc clean-up window, choose the C drive.
Click on Ok to start the process of cleaning the junk files.
Soon after the completion of the process, check if QuickBooks Error 324 got fixed.
Method 4: Clean Install QuickBooks
Open the Control Panel and navigate to the Programs and Features section.
Opt for QuickBooks in the list of installed applications.
Immediately thereafter, click on the Uninstall option.
Search for the key pertaining to QuickBooks error 324.
When located, choose the Export option in the File menu.
Choose the location where your backup key will be stored.
Choose the Export option soon after.
Finally, click on Save.
Ensure that the file is saved in the .reg extension.
Wind Up!!!
This blog apprised users with different methods for troubleshooting QuickBooks Error 324. If users want any technical assistance in this regard, they may call our support team at the helpline at +1-800-615-2347.
It looks intimidating to experience payroll update issues because they could cause the entire payroll procedure to halt. When a user tries to download payroll updates, errors like QuickBooks Error 12002 appear. The user receives a message from QuickBooks to apply the most recent payroll updates while they are still trying to resolve QuickBooks error 12002 . The wrong internet explorer settings and the incorrect firewall configuration are just two of the causes of this failure. For the problem to be resolved, Intuit® advises checking the Internet Explorer settings. You can find all the extra troubleshooting procedures to fix error 12002 in QuickBooks in this article's further sections, so this isn't the only approach to try out. A Brief Review of QuickBooks Payroll Update Error 12002 As an online service, QuickBooks Payroll needs a reliable internet connection to obtain the most recent payroll tax information for processing payroll. QuickBooks displays a var...
In all current QuickBooks Desktop editions, users have the option to use batch entry for their deposits, credit card charges, cheques, credit notes, bills, etc. Through this article, we shall dive in-depth into the procedure for entering or deleting transactions by batch in QuickBooks Desktop . Make sure to follow this article till the end. Steps for Entering and Deleting Transactions by batch in QuickBooks The following is a list of the steps involved in adding and deleting transactions in batches in QuickBooks Desktop . A backup of your company file should be made before continuing. Entering transactions by batch To enter transactions in batches, you need to first choose the Accountant option, and then tap the batch input transactions . At this point, choose the transaction type and account . Open the spreadsheet on which the transaction is contained that you need to enter into the QuickBooks field. To ensure that they are arranged in the same way as the Batch Tra...
If you use QuickBooks for several months, you might frequently encounter a number of software display issues on the desktop version of QuickBooks. QuickBooks' Windows black and white screen is one of them. This causes several of the QuickBooks desktop fields to start showing black instead of white. Other indicators, such as a grey screen in QuickBooks, missing symbols, grayish lines in invoices from QuickBooks, etc., can assist you in locating this issue. You can lose your vital business data as a result because of a corrupt system, which may be the cause. The QuickBooks screen turning black and white issue , however, can also be caused by a number of other factors. The next part will examine some potential reasons why QuickBooks turned black and white. How Come My QuickBooks Screen Is Turning Black And White? Are you oblivious to the reason why QuickBooks' screen goes black and white? It typically happens after prolonged use of the QB desktop. As a result, QuickBo...
Comments
Post a Comment