How to Solve QuickBooks Error 1712?
When you use QuickBooks and face the QuickBooks Error Code 1712 cause you have any trouble? You may fix the error and any other related problems with the help of this blog.
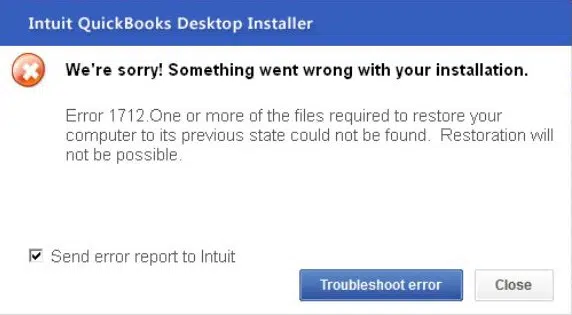
Therefore, if you try installing the QuickBooks desktop program in a corrupted folder or the operating system is damaged, you may run into the error 1712. However, by using specific troubleshooting techniques, the problem can be resolved.
Read
this page throughout to learn more about these correction methods. This blog
provides accurate information to solve the error in QuickBooks account.
What Causes the QuickBooks Error Code 1712?
It's time for you to investigate the causes of the mistake now
that you are aware of what is causing it. There may be several causes for the QuickBooks error 1712, including:
Without
first removing the prior version of QuickBooks, install QuickBooks.
●
In case the registry has any corruption.
●
If a malware attack of any kind is detected.
●
Installing a corrupted version of QuickBooks.
●
If specific software modifications are made on the same computer.
Symptoms of QuickBooks Install Error 1712
You can
recognize error 1712 if you identify some symptoms and indicators.
The following
are possible symptoms:
·
The screen displays a blue screen.
·
mistake in the input or output
·
Desktop QuickBooks freezes
·
shutdown problems
·
HTTP failure
·
system or laptop not functioning properly
·
incorrectly installing QuickBooks for the desktop
Use the Easy
solution to solve QuickBooks Error Code 1712
Many
times users search the easy solutions to solve these issues. Here we mentioned
all the valuable points to recover the entire problem.
Let's have a
look at the methods step by step:
Method 1:
Terminate all processes in the task manager
●
First, on your keyboard, press Ctrl + Shift + Delete.
●
Then select the Processes
tab.
●
The task manager's End process
option must be chosen.
●
Restart your system
to finish.
Method 2:
Track the application data in the registry
●
You must first look for regedit.exe
in a search engine.
●
Next, input the folders for HKEY
CURRENT USERSSoftwareMicrosoftWindowsCurrentVersionExplorerUSer Shell.
●
Press Entry AppData twice
now.
●
After that is finished, modify the Original value using the Local
profile path.
●
Reopen QuickBooks to check for errors as the last step.
Method 3: Use
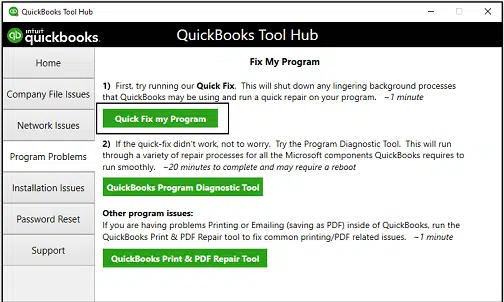
QuickBooks tools hub program
Step 1: Run
Quick fixes my Program from the QuickBooks Tools hub.
You
must first download and install the QuickBooks tools hub application before
using it.
First,
shut down the QuickBooks program.
●
Download the QuickBooks
tool hub file after that. Then, save the file where you can quickly find
it.
●
Open the QuickBooksToolHub.exe file that was downloaded in the
previous step.
●
Install the software by following the on-screen instructions, then
check the terms and conditions box.
●
Double-click the icon on the Windows desktop to launch the tool
hub after the installation is complete.
●
Pick the Program issues option from the QuickBooks tools portal.
●
Pick Quick fix my software from the menu now.
● Try again to install QuickBooks desktop to finish the process.
Step 2: Using
QuickBooks, Install the diagnostic tool from the tool hub
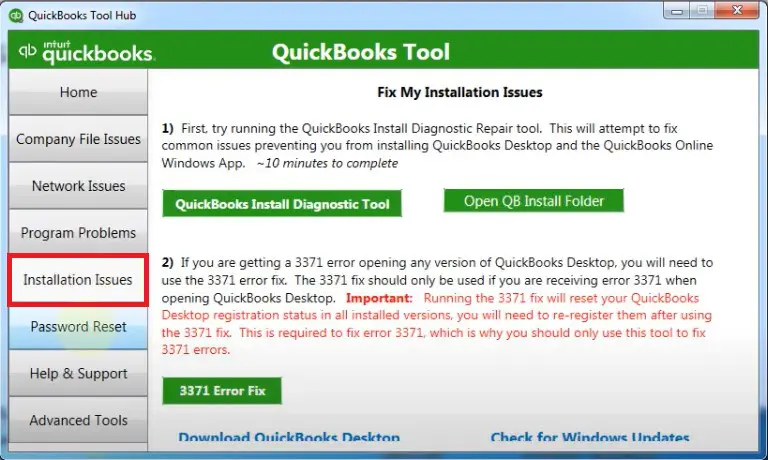
●
Go to the Installation Issues tab on your computer's tool hub
software. Next, select this option to install the QuickBooks diagnostic tool.
●
The first step is to download and install the QuickBooks install
diagnostic program on your computer.
●
After that, quit any currently active background-processing
programs.
●
Running the QuickBooks diagnostic tool after that.
●
The next step is to locate "I'm having trouble installing QuickBooks"
and then choose the OK tab.
●
Restart QuickBooks to
complete the operation.
●
Go to the QuickBooks Tools Hub and
select Program Issues.
●
Select the Quick Fix My Program tab next.
●
Finally, give QuickBooks installation another go.
Method 4:
Reinstall QuickBooks Desktop
●
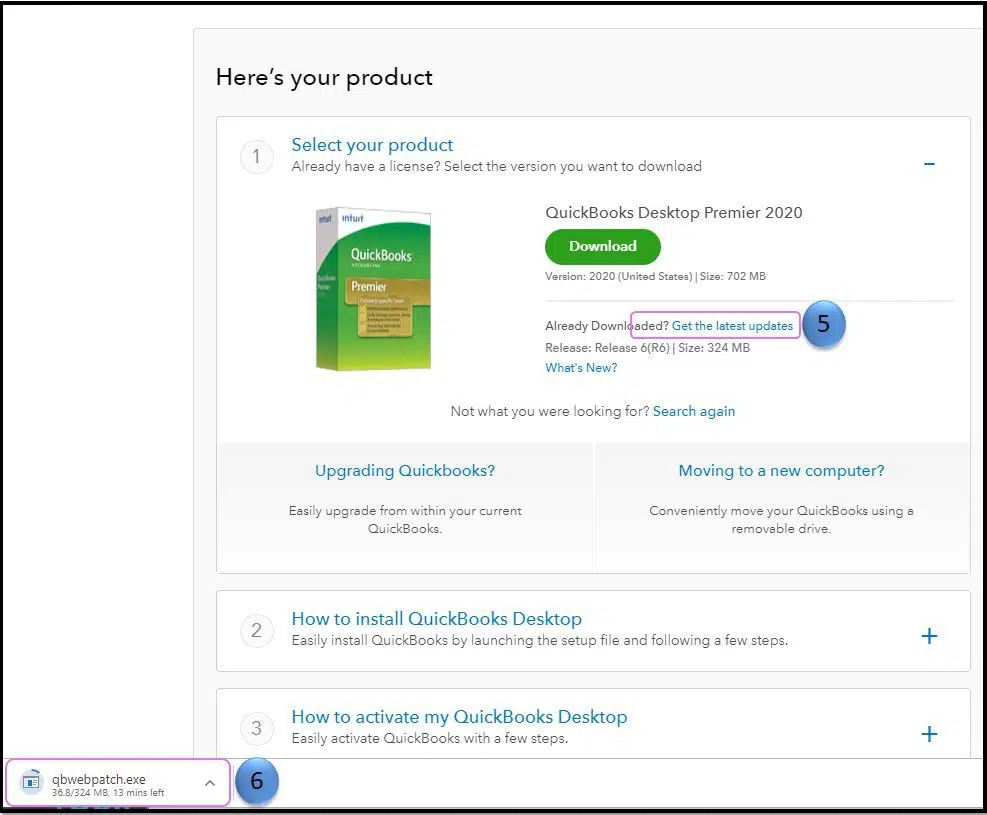
You can download the most recent version of the QuickBooks desktop
application from the official Intuit website.
●
Next, choose Change before going to the Product edition.
●
Next, choose the most recent version and click the Download
button.
Method 5:
Provide Admin Rights to the QuickBooks software
●
Start Windows by clicking it, and then select the Control Panel.
●
Visit the User Accounts
section of the control panel.
●
Look for QBDataServiceUserXX
for the software version that applies to you. Look for QBDataServiceUser30 in QuickBooks
Desktop 2020 and QBDataServiceUser29 in QuickBooks Desktop 2019.
●
Change account type and select Administrator.
●
Click Apply to save all of your changes.
●
Each QB Database Server Manager's instructions must be followed.
Final Words
Fixing the QuickBooks installation error
1712 is a little easy, with the steps that we have jotted
down in this segment. As always, if you have any queries, comments, or
suggestions, contact QuickBooks Error supports helpline i.e., 1-800-615-2347!


Comments
Post a Comment